Photoshop Techniques: Essential Tips for Beginners
Introduction
Photoshop techniques are the backbone of any graphic designer’s toolkit. Adobe Photoshop has long been the undisputed leader in graphic design, image manipulation, and digital art. For decades, it has been the go-to tool for both professionals and hobbyists, allowing users to bring their creative visions to life with unmatched precision. Whether you’re designing logos, editing photos, creating digital paintings, or preparing visual content for the web, Photoshop provides the tools and flexibility needed to turn your ideas into reality.
In this ultimate guide, we will explore the essential Photoshop techniques, advanced tools, and practical applications. Whether you’re a beginner just starting out or a seasoned pro aiming to enhance your skills, this guide will equip you with everything you need to excel in Photoshop and elevate your graphic design projects to the next level
Chapter 1: The Essential Tools of Photoshop
Photoshop’s interface can initially seem overwhelming due to the vast array of tools and features available. However, once you become familiar with the essential tools, you will find that Photoshop is highly intuitive and adaptable to your needs. Let’s break down the core tools every Photoshop user should know about:
1.1 Layers and Layer Styles
One of the most powerful features of Photoshop is its use of layers. Layers allow you to work non-destructively, meaning you can manipulate elements of your design independently without affecting the rest of the project. Each layer can contain different types of content, such as text, images, shapes, or effects.
- Layer Styles: These are pre-set effects that can be applied to layers, such as drop shadows, glows, and strokes. Using layer styles creatively can help you add depth and visual interest to your design.
- Adjustment Layers: Adjustment layers allow you to modify properties like brightness, contrast, and hue/saturation without affecting the underlying layer. This non-destructive editing makes it easier to experiment and make changes without permanent alterations to the original content.
1.2 The Toolbar
The Photoshop toolbar contains the most frequently used tools. While the exact tools visible in the toolbar may vary depending on your workspace, here are some of the most important ones to know:
- Move Tool: Used to move layers and selections around the canvas. It’s the first tool you’ll use to position elements within your design.
- Marquee Tool: This allows you to create rectangular or elliptical selections, which is essential when you want to isolate specific parts of an image or create a mask.
- Lasso Tool: The lasso tool enables you to draw freehand selections. It’s useful for creating irregular selections that the marquee tool can’t handle.
- Magic Wand Tool: The magic wand automatically selects areas of similar color. This is particularly useful for selecting large regions in an image that share the same hue, such as a clear sky or a solid-colored background.
1.3 Selection Tools
Selection tools are the foundation of many tasks in Photoshop, including isolating objects from their background, editing specific areas of an image, and applying effects to certain parts of the design. Here are the most popular selection tools:
- Quick Selection Tool: The quick selection tool makes it easy to “paint” a selection into an image. As you drag, the tool automatically finds edges and adds them to the selection.
- Pen Tool: The pen tool is used to create precise paths that can later be converted into selections. It’s indispensable for creating smooth curves and complex shapes, which makes it a favorite among professional graphic designers.
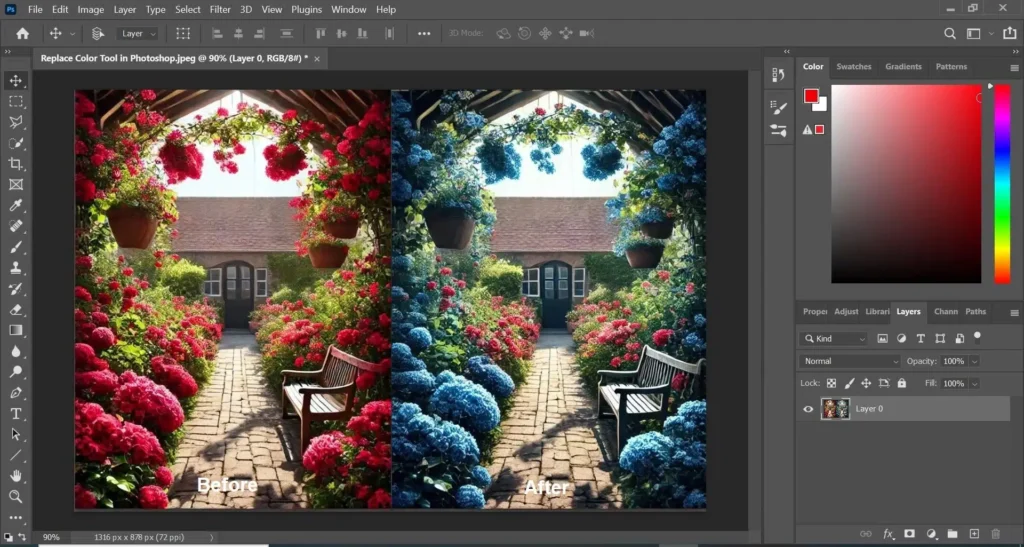
Chapter 2: Advanced Photoshop Techniques
While the essential tools and features of Photoshop are necessary for getting started, the true power of Photoshop comes to life when you begin using advanced techniques. These advanced methods give you the ability to create stunning, high-quality designs that are both creative and professional. In this section, we’ll cover some advanced techniques that every designer should master.
2.1 Working with Masks
Masks are one of the most important and powerful tools in Photoshop, allowing you to control the visibility of layers and their contents without permanently altering them. There are two main types of masks in Photoshop: layer masks and vector masks.
- Layer Masks: A layer mask allows you to hide parts of a layer non-destructively. By painting on the mask with black, you can hide areas of the layer, and by painting with white, you reveal them. This flexibility is essential for blending images together, correcting exposure, and creating complex compositions.
- Vector Masks: Vector masks are used for more precise control over layer visibility, especially when working with sharp edges and shapes. Unlike layer masks, vector masks are based on paths rather than pixels, which makes them perfect for creating clean and crisp edges.
Mastering masks enables you to create seamless composites, complex image manipulations, and more polished designs.
2.2 Blending Modes: Using Layers Creatively
Blending modes are another key tool in Photoshop’s arsenal, enabling you to control how different layers interact with each other. By changing the blending mode of a layer, you can achieve a wide range of effects, from soft lighting to dramatic contrasts.
Some commonly used blending modes include:
- Multiply: This darkens the underlying layers by multiplying the colors of the top layer with the bottom layer. It’s commonly used to darken images or enhance shadows.
- Screen: The opposite of Multiply, Screen lightens the image by inverting the dark areas of the top layer, which can brighten photos or add highlights.
- Overlay: This blending mode combines Multiply and Screen, allowing you to enhance both highlights and shadows without losing details. It’s often used for enhancing contrast in images.
By experimenting with blending modes, you can achieve stunning results, such as blending textures, enhancing colors, or creating artistic effects.
2.3 Creating Digital Art: Brushes and Customization
One of the most exciting aspects of Photoshop is its ability to create digital art from scratch. Photoshop’s brushes are a key tool for artists, and mastering them opens up endless possibilities for creative expression.
- Brush Customization: Photoshop allows you to create custom brushes that mimic traditional media, such as watercolor, charcoal, or oil paints. By adjusting the size, texture, and flow of your brushes, you can create unique effects that suit your artistic style.
- Brush Presets: There are hundreds of free and paid brush presets available online, which can be downloaded and installed in Photoshop. These presets are perfect for quickly adding texture, shading, and special effects to your artwork.
- Brush Tool Tips: When using the Brush tool, experiment with pressure sensitivity (if you’re using a graphics tablet) and adjust the hardness and opacity of the brush. These settings allow you to create more natural and nuanced strokes.
Chapter 3: Retouching and Restoring Photos
Photo retouching is one of the most commonly used features in Photoshop. Whether you’re removing blemishes, whitening teeth, or enhancing the overall appearance of a photo, Photoshop provides a variety of tools for professional-level photo restoration and retouching.
3.1 The Healing Brush and Clone Stamp
Two essential tools for photo retouching are the Healing Brush and the Clone Stamp.
- Healing Brush: The Healing Brush automatically blends the pixels of the area you are painting over, making it ideal for fixing imperfections, such as skin blemishes or wrinkles. Simply select the Healing Brush tool, hold down the Alt key to sample an area, and paint over the imperfection. Photoshop will automatically match the texture, lighting, and shading of the surrounding pixels.
- Clone Stamp: The Clone Stamp tool is similar to the Healing Brush but offers more control over the process. It allows you to sample a source area and paint it onto a new area. This tool is often used to duplicate objects, remove distractions, or fix larger areas of an image.
Both of these tools are essential for photo restoration and cleaning up images, enabling you to create flawless, high-quality photographs.
3.2 Color Correction and Enhancement
Photoshop offers a variety of tools to enhance and correct colors in an image, ensuring that your photos look vibrant and true to life. Some key color correction tools include:
- Curves: The Curves adjustment layer is one of the most powerful tools for color correction. It allows you to adjust the brightness and contrast of an image by manipulating the tonal range. You can use it to fine-tune highlights, midtones, and shadows for precise control over the image’s color balance.
- Levels: The Levels adjustment is another tool for correcting brightness and contrast. It allows you to adjust the black, gray, and white points of an image, making it easier to control the image’s exposure.
- Selective Color: If you want to adjust specific colors within an image, the Selective Color tool is perfect. This allows you to manipulate the hue, saturation, and luminance of specific colors, giving you the flexibility to enhance certain tones while preserving others.
By mastering color correction tools, you can take your photo retouching to the next level and ensure your images are visually striking and polished.
Chapter 4: Photoshop Applications in Graphic Design and Digital Artwork
As we continue our journey into mastering Adobe Photoshop, this third part focuses on the real-world applications of Photoshop in various design fields. Photoshop is not just for photo editing—it is a versatile tool that is used in graphic design, digital artwork, and user interface creation. This section will guide you through the practical ways Photoshop is utilized in professional design environments and how you can implement its features in your own projects.
4.1 Photoshop for Graphic Design
Graphic designers often rely on Photoshop for creating visual elements for both print and digital media. From logo design to advertisements and website layouts, Photoshop provides a wealth of tools that can bring creative concepts to life.
4.1.1 Logo Design
One of the most common uses for Photoshop in graphic design is creating logos. With its vector tools, layer management, and extensive selection of brushes, Photoshop offers a wide variety of options for creating high-quality logos.
- Shape Tools: Photoshop allows you to use vector-based shapes, such as rectangles, circles, and polygons, to create the foundation of your logo design. These shapes can be scaled and manipulated without losing quality, which is essential for producing logos that are used across different media.
- Text Tools: Typography plays a crucial role in logo design. Photoshop’s robust text tools allow you to adjust font size, style, tracking, and kerning, making it easy to experiment with different typography styles for a unique logo design.
- Layer Styles and Effects: Photoshop’s layer styles (such as drop shadows, gradients, and glows) can be applied to add depth and dimension to your logo. These effects can make a simple design appear more professional and polished.
4.1.2 Advertisements and Marketing Materials
Photoshop’s advanced editing tools make it a go-to for creating advertisements and marketing materials like posters, flyers, and banners. Designers can easily integrate typography, images, and vector graphics to produce visually compelling ads.
- Smart Objects: Photoshop’s Smart Objects allow you to work non-destructively. For example, if you’re designing an ad and need to replace an image, you can use a Smart Object to ensure that the image updates without affecting the overall design. This is incredibly useful for keeping projects consistent when working with templates.
- Image Manipulation: Photoshop’s ability to manipulate images is unmatched. Whether it’s removing the background of a product image or enhancing the color of a product shot, Photoshop allows designers to create visually stunning ads that grab attention.
4.1.3 Web Design and UI/UX
Photoshop also plays an important role in web design and user interface (UI) design. While many UI designs are now prototyped in vector-based software like Adobe XD or Figma, Photoshop remains a powerful tool for creating high-fidelity designs and visual mockups.
- Grid Systems and Layouts: Web designers use grid systems to structure layouts that are visually appealing and function well across different screen sizes. Photoshop’s customizable grids help designers align elements precisely, creating balanced compositions.
- High-Fidelity Mockups: Before development begins, Photoshop is often used to create pixel-perfect mockups of website pages, mobile apps, or even individual elements like buttons and icons. These mockups serve as a blueprint for developers to follow and ensure consistency throughout the project.
- Image Optimization: Photoshop allows designers to export images optimized for the web. Tools like the “Save for Web” feature allow you to adjust the file format, compression settings, and resolution to ensure that your images load quickly on websites without losing quality.
4.2 Photoshop for Digital Art and Illustration
In addition to graphic design, Photoshop is a popular tool for digital artists and illustrators who want to create artwork from scratch or manipulate existing images. With its brushes, layering system, and extensive toolset, Photoshop offers nearly limitless possibilities for digital artists.
4.2.1 Digital Painting
Photoshop’s brush tools are one of its most beloved features for digital painting. Artists can replicate the effects of traditional mediums, such as oils, watercolor, or charcoal, with high accuracy. Custom brushes can be created or downloaded to fit specific artistic needs, making Photoshop ideal for concept art, character design, and landscape painting.
- Pressure Sensitivity: For those using a graphics tablet, Photoshop’s pressure sensitivity feature allows for more natural and varied strokes. This is crucial for mimicking real-world brushstrokes, such as the dynamic pressure applied with a paintbrush.
- Custom Brushes: Photoshop allows artists to create their own brushes, which can simulate a wide range of textures and effects. Whether you want to paint with the texture of oil paint, add textures to backgrounds, or paint detailed fur on a character, custom brushes give you the flexibility to experiment.
4.2.2 3D Artwork and Animation
In addition to 2D art, Photoshop also supports basic 3D modeling and animation. While it is not a fully-fledged 3D modeling software like Blender, Photoshop can be used to create 3D text, extrude shapes, and create basic 3D objects for use in illustrations or animations.
- 3D Tools: Photoshop provides a set of 3D tools that allow users to convert text or shapes into 3D models. You can manipulate these models by rotating them in three-dimensional space, adjusting lighting, and applying materials to achieve realistic effects.
- Animation: Photoshop supports frame-by-frame animation, making it a great tool for creating simple animations or GIFs. Artists can create moving elements in a design or animate illustrations to bring them to life.
4.3 Photoshop for Photography: Editing and Retouching
While Photoshop is often associated with graphic design, it remains the industry standard for professional photographers who need to edit and retouch their images.
4.3.1 Photo Enhancement and Retouching
Whether you’re working with portraits or landscapes, Photoshop provides a comprehensive set of tools for enhancing photos. Photographers often use the Spot Healing Brush, Clone Stamp, and Dodge and Burn tools to correct imperfections and enhance images.
- Skin Retouching: One of the most common uses of Photoshop in portrait photography is skin retouching. Photographers can use the Healing Brush or Clone Stamp tool to remove blemishes, smooth out skin tones, and reduce wrinkles while maintaining a natural look.
- Sharpening and Noise Reduction: Photoshop offers advanced features like the Camera Raw Filter to reduce noise, sharpen images, and adjust clarity, making photos crisp and vibrant without introducing unwanted artifacts.
4.3.2 Composite Photography
Photoshop excels in compositing, the process of combining multiple images into one seamless photograph. This technique is often used in advertising and creative photography projects, where elements from different photos need to be blended into a single cohesive image.
- Layer Masking: As discussed in previous chapters, layer masks are essential for non-destructive editing. When compositing different images, layer masks allow you to blend parts of the images together, ensuring smooth transitions and avoiding harsh edges.
- Lighting Effects: Photoshop also enables photographers and digital artists to adjust the lighting in a composite image. Using the Lighting Effects filter, you can add custom lighting to a scene to make the composite look more realistic.
Chapter 5: Conclusion – Master Photoshop for Creative Excellence
Whether you’re a beginner just getting started with Photoshop or an experienced designer looking to enhance your skills, mastering Photoshop is essential for creating high-quality artwork, stunning designs, and professional-level photo manipulations. From basic photo editing to advanced illustration and 3D modeling, Photoshop provides the tools needed to bring your creative visions to life.
By exploring the many features and tools discussed in this guide, you can develop your Photoshop expertise and use it to push the boundaries of your creativity. No matter your design discipline—be it graphic design, photography, digital art, or UI/UX—Photoshop remains one of the most versatile and essential tools in the creative industry.
Chapter 6: Advanced Photoshop Techniques for Professionals
As we delve deeper into Photoshop’s capabilities, it’s time to explore some of the more advanced features and techniques that professional designers, photographers, and digital artists often use to elevate their work. These techniques allow you to push Photoshop to its full potential, enhancing the quality, efficiency, and creativity of your projects. In this section, we’ll discuss advanced tools, workflows, and tips that will help you work smarter, not harder.
6.1 Advanced Layering Techniques
One of the key strengths of Photoshop is its ability to work with layers, but mastering advanced layering techniques can take your designs to the next level. By utilizing sophisticated layering options, you can create intricate compositions, fine-tune your images, and manage complex projects more effectively.
6.1.1 Layer Styles and Blending Modes
Layer styles and blending modes are powerful tools that allow you to apply effects and manage how layers interact with each other.
- Layer Styles: These are non-destructive effects such as drop shadows, glows, bevels, and strokes. They can be applied to individual layers, and since they are non-destructive, you can adjust or remove them at any time. This is particularly useful for adding texture and dimension to text, logos, or other elements.
- Blending Modes: Blending modes control how layers interact with the layers beneath them. Commonly used modes like Multiply, Overlay, and Screen help create stunning effects, such as simulating lighting or blending images seamlessly together. Experimenting with blending modes can lead to unique results in photography editing and digital artwork.
6.1.2 Advanced Masking and Selections
Masking and selections are essential for isolating and editing specific parts of your images without affecting the rest. Advanced techniques allow for more precision, making it easier to work with complex images.
- Advanced Layer Masks: Layer masks allow you to hide or reveal portions of a layer, giving you the ability to work non-destructively. By using gradients, brushes, or the Refine Mask feature, you can achieve smoother transitions and more complex selections. This is particularly useful when dealing with intricate edges, such as hair or fur in portraits.
- Channel Selections: If you’re working with high-contrast images, channel selections can help you make more precise selections by isolating specific color channels. This technique is useful when you need to isolate subjects or objects with complex edges.
6.2 Non-Destructive Editing Workflow
Non-destructive editing is a crucial principle in professional photo editing and design workflows. It allows you to make changes to your images without permanently altering the original files, preserving flexibility for future adjustments.
6.2.1 Smart Objects and Smart Filters
Smart Objects are a game changer for non-destructive editing in Photoshop. A Smart Object is a layer that contains image data from raster or vector images, which means you can apply transformations, filters, and effects without affecting the original image.
- Smart Filters: These are filters that can be applied to a Smart Object. They are non-destructive and can be adjusted or removed at any time, allowing for greater flexibility. For example, you could apply a Gaussian Blur to a Smart Object and later adjust the intensity of the blur without having to reapply the effect.
- Smart Objects for Scalability: When you work with vector graphics or high-resolution images, Smart Objects allow you to scale the image up or down without losing quality, ensuring that the resolution remains intact.
6.2.2 Adjustment Layers and Masks
Adjustment Layers are used to apply color corrections, brightness, contrast, and other tonal adjustments to an image. What makes them powerful is that they are non-destructive, meaning you can adjust them at any time without altering the original image.
- Color Grading: In professional photo editing, color grading is essential for achieving the desired mood or aesthetic. Adjustment layers like Curves, Levels, and Selective Color can help you adjust the overall tone and color balance of your images to create professional-quality effects.
- Layer Masks for Precision: Adjustment layers can be combined with layer masks to selectively apply adjustments. For example, you could darken the background of an image without affecting the subject, giving you more control over the final output.
6.3 Photoshop for 3D Design and Animation
Photoshop offers powerful tools for 3D design and animation, allowing you to create interactive models, realistic textures, and even basic 3D animations. While not as advanced as specialized 3D software, Photoshop is still an excellent tool for integrating 3D elements into your 2D designs.
6.3.1 3D Text and Models
Creating 3D text and models in Photoshop can be a simple yet effective way to add depth to your designs. Whether you are designing for web, advertising, or multimedia projects, 3D elements can help you make your designs more dynamic.
- 3D Text: Photoshop allows you to convert your text into 3D objects, enabling you to rotate, scale, and adjust the extrusion depth. You can also apply materials, lights, and shadows to make the text look realistic.
- 3D Objects: You can create 3D shapes in Photoshop and apply materials such as metal, wood, or glass to give them a realistic look. These 3D models can be further edited, rotated, and even animated within Photoshop, though for more complex models, you might want to use a dedicated 3D tool like Blender.
6.3.2 Animation with Photoshop
While Photoshop isn’t typically used for professional-level animation, it provides enough tools to create basic animations such as GIFs or simple 2D animations. You can animate individual layers, adjust their properties over time, and export your creations in various formats.
- Timeline Panel: The Timeline panel allows you to create frame-by-frame animations by moving or modifying layers at different time intervals. This is perfect for creating moving elements in banners, simple GIFs, or animated illustrations.
- Frame Animation: Frame animation in Photoshop is a technique that involves creating multiple frames, where each frame represents a slight change in the image. This is the foundation for simple animations like walking cycles or transitions.
6.4 Photoshop for High-End Retouching and Restoration
For photographers and designers working in high-end retouching and restoration, Photoshop is the go-to software. Whether you’re retouching portraits, restoring old photographs, or editing commercial images, Photoshop provides advanced tools to help you achieve flawless results.
6.4.1 Portrait Retouching
Professional portrait retouching goes beyond simple blemish removal. It involves enhancing the overall appearance of the subject while maintaining natural skin textures and tones. Photoshop offers several tools to achieve this level of precision.
- Frequency Separation: Frequency separation is a technique used to separate the texture and color of a photo into different layers. This allows you to smooth out skin without affecting the skin’s natural texture. It is a common technique used in professional retouching to create smooth, flawless skin in portraits.
- Dodge and Burn: The Dodge and Burn tools allow you to lighten or darken specific areas of an image, helping to sculpt the subject’s face and body for a more flattering look. This technique is commonly used to enhance facial features, define cheekbones, and add depth to portraits.
6.4.2 Photo Restoration
Restoring old or damaged photographs is a delicate process that requires skill and patience. Photoshop provides all the tools you need to repair torn, faded, or damaged photos.
- Clone Stamp and Healing Brush: These tools are essential for removing unwanted blemishes, fixing torn areas, and restoring old photos to their original quality. The Healing Brush is particularly useful for matching the surrounding texture and color of the damaged area.
- Color Correction: Over time, old photographs can become discolored or faded. Photoshop offers powerful tools for color correction, such as the Levels and Curves adjustments, to restore the original vibrancy and color balance of old images.
Conclusion: Photoshop as an Essential Tool for Creative Professionals
In this advanced section of our Photoshop guide, we’ve covered a range of techniques that will help you master the tool for professional applications. From advanced layering and masking techniques to working with 3D elements and high-end retouching, Photoshop offers a wealth of features for designers, photographers, and artists.
The versatility of Photoshop makes it an indispensable tool in the creative industry. Whether you’re creating stunning graphics, manipulating photos, designing websites, or crafting digital artwork, Photoshop provides the tools and flexibility to help you bring your ideas to life. By mastering these advanced techniques, you can elevate your creative projects and produce professional-level work that stands out in any field.
To legally download Photoshop and access official documentation for learning, you can use the following links: For learning resources and official documentation on Photoshop, including tutorials and guides, check out Adobe Photoshop tutorials. For legal Photoshop download from Adobe’s official website, visit this link.
For businesses looking to improve team collaboration and streamline their workflow processes, Asana offers an effective solution. Asana helps optimize workflow management by providing a variety of tools designed for project tracking, task management, and team communication. This comprehensive guide highlights how businesses can leverage Asana to improve productivity, reduce inefficiencies, and ensure that all team members are on the same page. To learn more about optimizing your team’s workflow using Asana, check out our detailed article here.






Post Comment