The Ultimate Affinity Photo Guide: Mastering Techniques & Tools
Introduction to Affinity Photo: The Ultimate Tool for Photo Editing
Affinity Photo has rapidly gained popularity among photographers, designers, and digital artists, and it’s easy to see why. With its powerful features, professional-grade tools, and budget-friendly price point, Affinity Photo has proven itself to be a top contender in the world of photo editing software. Whether you’re a seasoned professional or a budding enthusiast, mastering Affinity Photo can unlock a world of creative possibilities.
In this Affinity Photo guide, we’ll walk you through everything you need to know, from the basic tools to advanced techniques. By the end of this article, you’ll be well-equipped to take full advantage of Affinity Photo’s capabilities and create stunning images.
What is Affinity Photo?
First, let’s define what Affinity Photo is all about. Developed by Serif, Affinity Photo is a versatile photo editing software that rivals industry giants like Adobe Photoshop, but at a fraction of the cost. What sets Affinity Photo apart is its ability to deliver high-quality, professional results without the hefty subscription fees typically associated with other photo editing tools.
This software is suitable for a variety of tasks, such as:
- Photo retouching
- Image composition
- Advanced photo manipulation
- Illustration work
- Designing graphics for web or print
With an intuitive user interface and a robust set of tools, Affinity Photo is perfect for both novice and expert users.
Why Choose Affinity Photo?
Affordability is one of the standout advantages of Affinity Photo. Unlike other industry-standard tools like Photoshop, which require expensive subscriptions, Affinity Photo offers a one-time purchase, making it much more affordable in the long run.
But affordability isn’t the only reason to choose Affinity Photo. The software is also known for its:
- Non-destructive editing: You can make changes to your images without permanently altering the original file.
- Layer-based editing: Similar to other advanced photo editors, Affinity Photo allows you to work with layers, masks, and blending modes.
- Compatibility: It works seamlessly with a wide range of file formats, including PSD, JPEG, TIFF, and even RAW files.
- No subscription model: Once you purchase Affinity Photo, you own the software outright. There are no monthly payments, which is a huge relief for many users.
Whether you’re editing portraits, landscapes, or creating complex composites, Affinity Photo offers a wealth of features to suit your needs. In this guide, we’ll explore each of these features in detail, providing tips and tricks to help you master the software and enhance your photo editing workflow.
A Look at What You’ll Learn
In this Affinity Photo guide, we’ll cover the following topics:
- Getting Started with Affinity Photo: Learn the basics, including installation and user interface navigation.
- Key Features and Tools: Dive into the core tools and their functionalities.
- Advanced Techniques: Learn how to use Affinity Photo for advanced photo manipulation and editing.
- Tips and Tricks: Discover ways to speed up your workflow and maximize efficiency.
- Affinity Photo vs. Other Software: Compare Affinity Photo with competitors like Photoshop and GIMP.
By the end of this guide, you’ll be able to create stunning images, whether you’re editing a portrait, designing a logo, or enhancing a landscape photo.
Getting Started with Affinity Photo – The Basics
| Step | Action | Description |
|---|---|---|
| 1. Install Affinity Photo | – Purchase, download, and install the software. | Get Affinity Photo from the official site, install it, and activate with your license key. |
| – Activate and start working. | After activation, begin exploring and using Affinity Photo’s features. | |
| 2. Navigate the UI | – Familiarize with Toolbar, Panels, Document Window, and Menu Bar. | The main areas for editing and managing your project. |
| 3. Set Up Workspace | – Customize and save panel layout. | Rearrange panels to fit your needs, and save the layout for future use. |
| 4. Basic Tools | – Use Move, Selection, Brush, Adjustment Layers, and Clone Tool. | Essential tools for editing, retouching, and non-destructive adjustments. |
| 5. Create First Project | – Create a new document or import an image. | Start a project by creating a new document or importing an image for editing. |
| 6. Save Work | – Save in Affinity Photo format for easy future edits. | Save your work regularly in AFP format for future adjustments. |
| 7. Tips for Beginners | – Practice basic edits, explore tutorials, and use non-destructive editing. | Start with basic tasks, learn through tutorials, and use Adjustment Layers for non-destructive edits. |
Now that we’ve covered an overview of Affinity Photo, it’s time to dive into the basics. In this section, we will guide you through the initial steps of getting started with Affinity Photo, ensuring that you are comfortable navigating the software and utilizing its essential features.
Installing Affinity Photo
Before you can start editing, you need to install Affinity Photo on your computer. The process is straightforward and simple:
- Purchase the Software: Head over to the official Affinity website and purchase Affinity Photo. You’ll be given the option to download the version compatible with your operating system, whether it’s Windows, MacOS, or iPad.
- Download and Install: Once the purchase is complete, download the installer and follow the on-screen instructions to install the software on your system.
- Activation: After installation, launch Affinity Photo. You’ll be prompted to enter your license key to activate the full version.
- Start Working: Once installed and activated, you’re ready to start using Affinity Photo and exploring its powerful features.
Navigating the User Interface
The Affinity Photo guide wouldn’t be complete without introducing you to the user interface (UI), as this is your workspace for every project you create. Here’s a quick breakdown of the main components of the Affinity Photo workspace:
- Toolbar: Located on the left side of the screen, the toolbar contains all the tools you’ll need for editing your images. These tools are categorized by function, such as selection tools, brush tools, and retouching tools.
- Panels: On the right side of the workspace, you’ll find various panels such as Layers, Colors, History, and Brushes. These panels help you manage your project and adjust settings.
- Document Window: In the center, you’ll see the open image or project you’re working on. This is where you’ll make edits, apply filters, and experiment with various adjustments.
- Menu Bar: Located at the top, the menu bar contains options for file management, editing, and accessing advanced settings. It’s where you’ll find the commands for opening, saving, and exporting your work.
Take some time to familiarize yourself with these elements, as they are the building blocks of your Affinity Photo editing workflow.
Setting Up Your Workspace
One of the first things you should do when starting with Affinity Photo is to customize your workspace. You can arrange the panels and tools in a way that suits your preferences. Here’s how you can set up a workspace that works best for you:
- Customize Panels: Drag and dock panels to different positions, such as on the right, left, or floating. This gives you control over how your workspace is organized.
- Save Your Workspace: Once you have arranged your panels, you can save the layout for future use. This makes it easy to return to your preferred workspace setup, especially if you work on multiple devices or projects.
To make your workflow even smoother, consider using shortcuts for the most frequently used tools and commands. These time-saving tips will help you focus on creating rather than navigating the interface.
Basic Editing Tools and Techniques
At the core of Affinity Photo are the basic editing tools, which are essential for making adjustments to your images. Let’s look at some of the key tools and techniques that you’ll use frequently:
- Move Tool: This tool allows you to move layers and objects within your project. It’s perfect for repositioning elements and making precise adjustments to your composition.
- Selection Tools: With selection tools like the Marquee Tool and Lasso Tool, you can isolate specific areas of your image for editing. Whether you need to select a small section for color correction or remove a background, selection tools are indispensable in Affinity Photo.
- Brush Tool: The brush tool is one of the most versatile tools in Affinity Photo. It lets you paint directly on your image, whether you’re retouching, applying effects, or creating digital artwork.
- Adjustment Layers: Adjustment Layers allow you to make non-destructive edits to your images. These layers adjust the color, contrast, exposure, and other settings without permanently altering the original image.
- Clone Tool: Perfect for removing unwanted objects from your image, the Clone Tool duplicates parts of the image to cover areas you want to erase.
These are just a few of the essential tools you’ll encounter when getting started with Affinity Photo. As you gain more experience, you’ll become familiar with even more advanced features and techniques that will take your editing skills to the next level.
Creating Your First Project
To start your creative journey with Affinity Photo, open a new document or import an image you want to edit. Here’s how to create your first project:
- Create a New Document: Go to the File menu, select New, and choose the dimensions and resolution for your document. You can also choose a preset size based on the type of project you’re working on.
- Import an Image: If you’re working with a photograph, go to File > Open, and select the image you want to edit. This will open the image in the Document Window, where you can begin applying edits and adjustments.
- Save Your Work: Don’t forget to save your project! Go to File > Save As to choose a location and file type. For most projects, it’s a good idea to save your work in the Affinity Photo format (AFP) so you can come back and make adjustments later.
Tips for Beginners
- Practice with Basic Edits: If you’re new to photo editing, start with simple tasks like cropping, straightening, and adjusting the brightness and contrast.
- Explore Tutorials: There are many online resources, including YouTube videos and Affinity Photo tutorials, to help you learn more about the software’s features.
- Use Non-Destructive Editing: Always work with Adjustment Layers and duplicate your images so you can revert back to the original if needed.
Advanced Techniques in Affinity Photo
As you become more comfortable with the basics of Affinity Photo, it’s time to explore some advanced techniques that can elevate your photo editing skills to the next level. This section of the Affinity Photo guide will introduce you to more powerful tools and features that professionals use to create stunning images.
Working with Layers and Masks
One of the most powerful aspects of Affinity Photo is its ability to work with layers and masks. Layers allow you to separate different elements of your image so that you can adjust them independently, while masks enable you to hide or reveal specific parts of your layers non-destructively.
Creating and Managing Layers
- New Layers: You can create a new layer by going to the Layers panel and selecting New Layer. From here, you can add different elements, such as text, shapes, and adjustments.
- Layer Effects: Affinity Photo allows you to apply various effects to your layers, such as shadows, glows, and outlines. You can also adjust the opacity and blending modes of layers to create more complex and visually appealing designs.
- Grouping Layers: As you work on multiple elements, it’s a good idea to group your layers for better organization. Simply select multiple layers and press Ctrl+G (Windows) or Cmd+G (Mac) to group them together.
Using Masks for Non-Destructive Editing
- Layer Masks: To create a mask, select the layer you want to mask and click on the Add Layer Mask button at the bottom of the Layers panel. This will create a white mask, allowing you to paint with black to hide parts of the layer and white to reveal them.
- Gradient Masks: Affinity Photo also allows you to use gradients as masks. This is especially useful for blending different elements seamlessly, such as transitioning from a bright to a dark background.
Advanced Selections and Refine Edge
Selections are an essential part of photo editing, and Affinity Photo offers advanced selection tools that allow you to isolate specific parts of your image with precision.
Using Selection Tools
- Marquee Tool: The Marquee Tool is great for basic rectangular or elliptical selections. Use it for simple tasks like cropping or creating geometric shapes.
- Lasso Tool: For freeform selections, the Lasso Tool is your best friend. You can draw around the edges of objects with precision to create intricate selections.
- Magic Wand Tool: The Magic Wand Tool allows you to select areas with similar colors. This tool is incredibly useful when working with images that have clear, uniform areas, such as blue skies or solid-colored backgrounds.
Refining Selections with Refine Edge
Once you’ve made your selection, Affinity Photo allows you to refine the edges for a smoother, more natural look. Here’s how to use the Refine Edge tool:
- With your selection active, click the Refine button in the context toolbar.
- Use the brush tool to paint over areas that need refinement, such as hair or fur.
- Adjust the settings like Feather, Smooth, and Contrast to fine-tune your selection’s edge.
Refining selections is a crucial step in creating realistic composites and ensuring that cut-out images blend seamlessly with their new backgrounds.
Using Filters and Effects
Affinity Photo offers a wide range of filters and effects that allow you to apply unique styles and adjustments to your photos. These effects can be applied to layers, groups, or even specific areas of your image.
Applying Basic Filters
- Gaussian Blur: One of the most common filters, Gaussian Blur, softens your image by blurring out certain areas. This can be used for portrait retouching or to create a soft focus effect.
- Sharpen: To bring out fine details in your images, the Sharpen filter is a go-to option. It enhances the edges of objects and makes your photo appear clearer.
- Noise Reduction: If you’re working with low-light images, you can apply noise reduction to reduce graininess and make your photos appear cleaner.
Creative Effects
- Tilt-Shift: Affinity Photo offers a Tilt-Shift filter that simulates a miniature effect by blurring parts of your image while keeping the focal point sharp. This is especially fun for creating a “miniature world” look.
- Lens Flare: Add a Lens Flare effect to mimic the look of light entering the lens of a camera. This is often used in landscape or creative photography for dramatic effects.
- Dodge and Burn: The Dodge and Burn tools allow you to lighten or darken specific areas of your image, helping to add contrast and depth. These tools are often used for portrait retouching to enhance features like cheekbones or to bring out highlights in a photo.
Working with Text and Typography
Affinity Photo isn’t just for photos — it’s also great for creating graphics and typography. With its robust text tools, you can add dynamic text to your projects with full control over fonts, colors, and styles.
Adding and Styling Text
- Add Text: Use the Text Tool to click on your image and type your text. You can adjust the size, font, and color in the context toolbar.
- Text Effects: Apply various effects to your text, such as drop shadows, glows, and strokes, to make it stand out and integrate smoothly with your design.
- Text on a Path: Affinity Photo allows you to create text that follows a path, such as along a curve or a custom shape. This is perfect for creating logos or stylized text.
- Character and Paragraph Styles: The Character and Paragraph panels provide precise control over your text’s appearance, such as line spacing, kerning, and alignment.
Working with RAW Files
Editing RAW files in Affinity Photo is an essential skill for photographers who want to maintain the highest quality and flexibility when adjusting their images. Here’s how to process and edit RAW files in Affinity Photo:
- Open RAW Files: When you open a RAW image, Affinity Photo automatically launches the Develop Persona where you can make non-destructive adjustments like exposure, white balance, and contrast.
- Fine-Tuning RAW Files: The Develop Persona gives you full control over how your RAW image is processed before moving on to more detailed edits. Make sure to adjust the shadows, highlights, and noise reduction for a better final result.

Expert Tips and Workflow Enhancements in Affinity Photo
At this stage in your journey, you’ve already covered the basics and some advanced techniques. Now, it’s time to dive into expert tips and workflow enhancements that can make your photo editing experience smoother and more efficient. Whether you’re a photographer, graphic designer, or digital artist, these insights will help you maximize the potential of Affinity Photo.
Customizing Your Workspace for Optimal Efficiency
One of the great advantages of Affinity Photo is its flexibility. You can fully customize your workspace to suit your workflow. Here’s how to make your workspace work for you:
Customizing Toolbars and Panels
- Toolbars: If you find certain tools you use frequently buried in menus, you can add them directly to your toolbar for faster access. Simply right-click on any tool or panel and select Customize Toolbar to add or remove tools based on your preferences.
- Panels: You can dock, stack, or float your panels in Affinity Photo. This allows you to arrange them in a way that suits your working style. If you work with multiple screens, you can also separate panels across different monitors for a more spacious and organized workspace.
Saving Your Workspace Layout
Once you’ve set up your ideal workspace, save it by going to View > Studio > New Workspace. This way, you can easily switch between different layouts depending on the task at hand (e.g., photography edits, graphic design, retouching).
Streamlining Your Workflow with Keyboard Shortcuts
Mastering keyboard shortcuts is a game-changer for improving your editing speed. Affinity Photo comes with a set of default shortcuts, but you can also create custom ones that are tailored to your needs. Here are a few essential shortcuts to get started:
Common Shortcuts to Know
- Ctrl + N (Windows) or Cmd + N (Mac): Create a new document.
- Ctrl + S (Windows) or Cmd + S (Mac): Save your work.
- Ctrl + Z (Windows) or Cmd + Z (Mac): Undo an action.
- Ctrl + Shift + Z (Windows) or Cmd + Shift + Z (Mac): Redo an action.
- Ctrl + C (Windows) or Cmd + C (Mac): Copy a selected area.
- Ctrl + V (Windows) or Cmd + V (Mac): Paste a copied area.
Creating Custom Shortcuts
You can set custom shortcuts by going to Edit > Preferences > Keyboard Shortcuts. Here, you can assign specific actions to keys that you use frequently, allowing you to navigate the software faster and more intuitively.
Non-Destructive Editing with Adjustment Layers
One of the main benefits of using Affinity Photo is the ability to make non-destructive edits. Instead of permanently altering your images, you can use adjustment layers to apply changes without modifying the original image data.
Using Adjustment Layers
Adjustment layers allow you to apply various changes such as exposure, contrast, and color balance without affecting the pixels of the underlying image. Some key adjustment layers you might use include:
- Brightness/Contrast: Adjust the overall lightness or darkness of your image.
- Levels: Control the tonal range by adjusting the shadows, midtones, and highlights.
- Hue/Saturation: Adjust the colors in your image by changing the overall hue or saturation of specific areas.
Working with Layer Clipping
Clipping is a technique that allows you to apply an adjustment layer to a specific layer beneath it, rather than the entire image. To use clipping, simply hold Alt (Windows) or Option (Mac) and click between two layers in the Layers panel. The adjustment will now only affect the layer directly beneath it, giving you more precise control.
Creating and Working with Brushes
Brushes are one of the most versatile tools in Affinity Photo, allowing you to paint on your image, add textures, or even create digital artwork. Affinity Photo offers an impressive selection of brushes, but you can also import your own or create custom ones.
Using the Brush Tool
To start painting, select the Brush Tool from the toolbar or press B. You can adjust the size, hardness, and opacity of your brush from the Context Toolbar at the top of the screen. If you want to paint with more precision, you can also change the flow or use pressure sensitivity if you’re working with a drawing tablet.
Creating Custom Brushes
To create your own brushes, go to View > Studio > Brushes to open the Brushes panel. From here, you can create a new brush, choose a texture or shape, and adjust the dynamics to suit your needs. This allows for incredible creativity, whether you’re designing a logo, adding texture to a background, or painting a digital artwork.
Creating Stunning Composites
If you’re looking to create eye-catching composites (combining multiple photos or elements into a single image), Affinity Photo has all the tools you need to blend images seamlessly.
Using Blend Modes for Smooth Compositing
Blend modes in Affinity Photo allow you to control how layers interact with each other. Experimenting with different blend modes will help you create stunning effects when combining multiple images. Some popular blend modes include:
- Multiply: Darkens the base layer, useful for shadows.
- Screen: Lightens the base layer, perfect for highlights.
- Overlay: Combines Multiply and Screen for high-contrast effects.
Aligning Layers in Composites
When combining images, it’s crucial to align them correctly to ensure they look natural together. Affinity Photo offers an automatic alignment feature when working with multiple layers. You can also manually adjust the position of each layer to fine-tune your composition.
Exporting Your Images
Once you’ve completed your masterpiece, it’s time to export your image for use in your final project. Affinity Photo offers a range of export options to suit different needs.
Exporting for Web or Print
- File > Export: Choose between different formats like PNG, JPEG, TIFF, or even PSD (for compatibility with other Adobe products).
- File > Export Persona: For more complex projects, the Export Persona offers additional options for exporting assets, especially when working with multiple layers or slices.
Saving Presets for Future Exports
If you frequently export images in the same format and size, you can save your export settings as a preset. This will allow you to quickly apply the same settings to future images, streamlining your workflow.
Advanced Photo Editing Techniques in Affinity Photo
In this section, we explore advanced techniques that will help you push the boundaries of your photo editing in Affinity Photo. These methods will elevate your skills, whether you’re working on high-end retouching, artistic effects, or professional photo projects.
Advanced Retouching: Enhancing Portraits and Skin
Frequency Separation Technique
Frequency separation is a professional technique for editing skin tones and textures separately. This method allows precise control over skin smoothness and tone adjustments, ideal for retouching portraits without compromising the skin’s natural texture. To use it:
- Duplicate the image layer.
- Apply Gaussian Blur to the bottom layer to smooth colors and tones.
- Use the High Pass filter on the top layer to preserve fine details.
- Adjust the texture layer for imperfections and the color layer for tone refinement.
This process gives portraits a natural, polished look.
Skin Smoothing with the ‘Inpainting’ Brush
The Inpainting Brush Tool is a fast way to remove blemishes and imperfections on the skin. Simply paint over the areas you want to remove, and Affinity Photo will intelligently fill them with pixels from the surrounding area, preserving skin texture and tone.
Mastering Layer Masks for Complex Edits
Layer masks offer non-destructive editing, giving full control over hiding or revealing parts of a layer. To add a mask, select a layer and click “Add Layer Mask.” By painting with black or white on the mask, you can control transparency, with gray areas offering partial transparency for more nuanced effects.
Using Gradient Masks for Seamless Blending
Gradient Masks enable smooth transitions between layers, perfect for composites where blending is key. Select a layer, then apply a gradient mask by dragging from the area where you want the transition to begin to where it should end. This creates a soft fade, making the combination of elements appear seamless.
Creative Effects: Adding Artistic Filters and Textures
Adding Texture with the ‘Add Noise’ Filter
The Add Noise filter introduces texture to your image, ideal for simulating film grain or enhancing digital art. Experiment with noise levels and blending modes to achieve the desired effect.
Artistic Filters: Turning Photos into Paintings
Affinity Photo includes artistic filters like Oil Paint, Watercolor, and Painting that transform photos into stylized artwork. Apply these filters from the Filters > Artistic menu and adjust settings to create unique, creative effects.
Creating Stunning HDR Images
High Dynamic Range (HDR) imaging helps you capture a wider range of light, ideal for scenes with high contrast like sunsets or cityscapes. To create HDR images:
- Capture multiple exposures of the same scene.
- In Affinity Photo, go to File > New HDR Merge to combine the images.
- Use Tone Mapping to fine-tune the dynamic range, color balance, and appearance.
This technique is essential for professional landscape or architectural photography.
Advanced Color Grading for Cinematic Looks
Color grading enhances the mood of your image, allowing you to achieve anything from a cinematic look to a vintage vibe. Use adjustment layers like HSL (Hue, Saturation, Luminance) and Curves to adjust color balance. Add a cinematic touch by using Split Toning for highlights and shadows. Layer masks allow selective color adjustments for precise control over specific areas of the image.
Exporting High-Quality Images for Professional Use
When your editing is complete, it’s time to export your image based on your intended use.
Optimizing for Print
For print, ensure your image is at 300 DPI (dots per inch) for high-resolution output. Export it in TIFF or JPEG formats.
Optimizing for Web
For web use, compress your images while maintaining high quality. In the Export Persona, select PNG, JPEG, or WebP formats, adjusting the quality slider for a balance between image quality and file size.
Mastering Advanced Compositing, Vector Graphics, and More in Affinity Photo
Now that you’ve mastered Affinity Photo‘s photo editing tools, it’s time to tackle some of the most powerful features that will help you create complex compositions, work with vector graphics, and push your editing skills to new heights. Whether you’re working on a professional design, creating high-end photo composites, or delving into advanced workflows, these advanced tools will be key to achieving your vision.
Advanced Compositing: Creating Seamless Photo Merges
| Step | Tool or Technique | Description |
|---|---|---|
| Precise Selection | Selection Brush Tool | This tool allows you to quickly select areas of your image. Simply paint over the areas you want to select, and the tool will automatically detect the edges. |
| Refining the Edges | Refine Edge Tool | Once you’ve made a rough selection, use the Refine Edge tool to fine-tune the edges. This is especially useful for intricate details like hair and fur. |
| Layer Placement | Layer Masks | Place images on separate layers and use Layer Masks to hide unwanted areas, ensuring a clean transition between images. |
| Creating Smooth Transitions | Gradient Mask Tool | Use this tool to create smooth, seamless transitions between layers, blending the edges naturally. |
| Final Adjustments | Brush Tool | Use the Brush Tool for fine-tuning edges and making the blend more natural and seamless. |
One of the most exciting capabilities of Affinity Photo is its ability to seamlessly combine multiple images into one composition. Whether you’re creating a surreal landscape or blending several elements for a digital art piece, Affinity Photo offers powerful tools to make your composites look natural and professional.
Using the ‘Advanced Selection’ Tools
In compositing, precision is crucial. Affinity Photo’s Selection Brush Tool and Refine Edge features will help you create perfect selections that make it easier to blend different layers together.
- Selection Brush Tool: This tool allows you to quickly select areas of your image. Simply paint over the areas you want to select, and the tool will automatically detect the edges and fill in the selection.
- Refine Edge Tool: Once you have a rough selection, use the Refine Edge tool to fine-tune the edges of the selection. This is especially useful for hair, fur, and other intricate details.
After refining your selection, you can copy and paste the selected part into a new layer, allowing you to easily merge it with other elements.
Layering for Seamless Blending
When combining multiple images, proper layering and masking are key to achieving a seamless blend. Use Layer Masks to hide or reveal parts of a layer, and the Gradient Mask tool to ensure smooth transitions between layers. The Opacity and Blending Modes will also help you control how layers interact with each other.
- To start, place the images on separate layers.
- Use Layer Masks to hide unwanted areas and ensure smooth transitions.
- Fine-tune the edges with the Brush Tool for a more natural blend.
These steps will help create stunning, complex photo composites that look effortless and natural.
Working with Vectors: Creating Crisp Designs and Illustrations
Unlike traditional photo editing, Affinity Photo also supports vector-based design, allowing you to create logos, icons, illustrations, and more. The Vector Tools are a powerful addition to the software, enabling you to integrate scalable graphics seamlessly with your photos.
Using the Pen Tool for Precise Vector Paths
The Pen Tool is one of the most essential tools in vector design. It allows you to create precise, adjustable paths that can be used for creating everything from logos to intricate designs.
- To create a path, simply click to add anchor points, and drag the handles to control the curvature.
- Once you have your path, you can easily convert it into a shape or adjust its stroke and fill settings.
The Pen Tool gives you the flexibility to create sharp, clean lines that can be scaled to any size without losing quality.
Combining Vectors with Images
One of the powerful features of Affinity Photo is the ability to combine vector elements with raster images. Whether you’re working on an illustration or adding design elements to a photo, you can create dynamic compositions by combining both types of assets.
- After creating your vector shapes or illustrations, you can place them over your photos as separate layers.
- Adjust the opacity, colors, and blending modes to integrate them seamlessly into your image.
This combination of raster and vector editing is especially useful when designing posters, social media graphics, and digital art pieces.
Working with Text: Creating Stunning Typography Effects
Typography is an essential aspect of any design project, and Affinity Photo gives you the tools to create beautiful, professional text effects. From simple text placement to advanced effects, you can bring your creative vision to life with the Text Tool and its extensive options.
Customizing Text with Effects
Once you’ve added text, Affinity Photo offers a wide range of options to customize it. You can apply 3D Effects, Drop Shadows, Glows, and even Distortions to create a dynamic visual impact.
- To add text, select the Text Tool and click on your canvas to start typing.
- Use the Character Panel to adjust font size, spacing, and other attributes.
- For more advanced effects, apply a Layer Style to add shadows, outlines, or embossing.
This functionality is perfect for creating eye-catching headlines, branding materials, or social media graphics that stand out.
Warping and Transforming Text
If you want to get even more creative, Affinity Photo allows you to warp and distort text for a more dynamic look. The Path Text Tool lets you bend and shape text along a path, while the Mesh Warp tool enables you to distort text into complex shapes.
- Create a custom path, and use the Path Text Tool to bend the text along it.
- To distort text, select the Mesh Warp Tool, and manipulate the text to achieve your desired shape.
These tools provide endless possibilities for designing unique text effects that will make your project truly shine.
Advanced Workflow and Shortcuts for Efficiency
As you become more familiar with Affinity Photo, it’s important to speed up your workflow and improve your efficiency. By using keyboard shortcuts, macros, and customizing your workspace, you can streamline your editing process and get more done in less time.
Setting Up Your Workspace for Maximum Efficiency
Affinity Photo allows you to customize your workspace to suit your needs. Whether you prefer a more compact layout or you need a full-screen workspace, you can adjust the interface to your liking.
- Go to View > Studio to enable or disable panels and tools based on your preferences.
- Create custom toolbars and shortcuts for the tools you use most often.
This custom workspace will help you access the tools you need quickly, making your editing process smoother and more efficient.
Using Macros to Automate Repetitive Tasks
If you frequently perform the same series of tasks, Affinity Photo lets you record macros to automate those processes. Macros can save you a lot of time, especially for tasks like batch processing, resizing, or applying filters to multiple images.
- To record a macro, go to View > Studio > Macros, and click the Record button to start.
- Perform your usual workflow, and when you’re finished, click Stop Recording.
- Now, you can play back the macro to repeat the process in just one click.
This feature is particularly useful when working on large projects or when you need to apply the same edits to multiple photos.
Preparing Files for Print: Resolution and Color Spaces
Before printing your edited images, it’s crucial to prepare them correctly. The resolution and color space settings are essential to ensure your images look as good on paper as they do on screen.
Choosing the Right Resolution for Print
For professional-quality prints, set your image’s resolution to at least 300 DPI. This ensures the image will be sharp and detailed when printed at larger sizes.
- Go to Document Settings and set the resolution to 300 DPI before you begin editing.
- Always check the size of your image in relation to the print dimensions to ensure it’s large enough for print.
Setting the Correct Color Space
For printing, use a CMYK color space, as it’s optimized for print materials. You can convert your image from RGB to CMYK in Affinity Photo by going to Document > Convert Format / ICC Profile and selecting the appropriate profile.
By using the correct resolution and color space, you’ll ensure that your prints are of the highest quality.
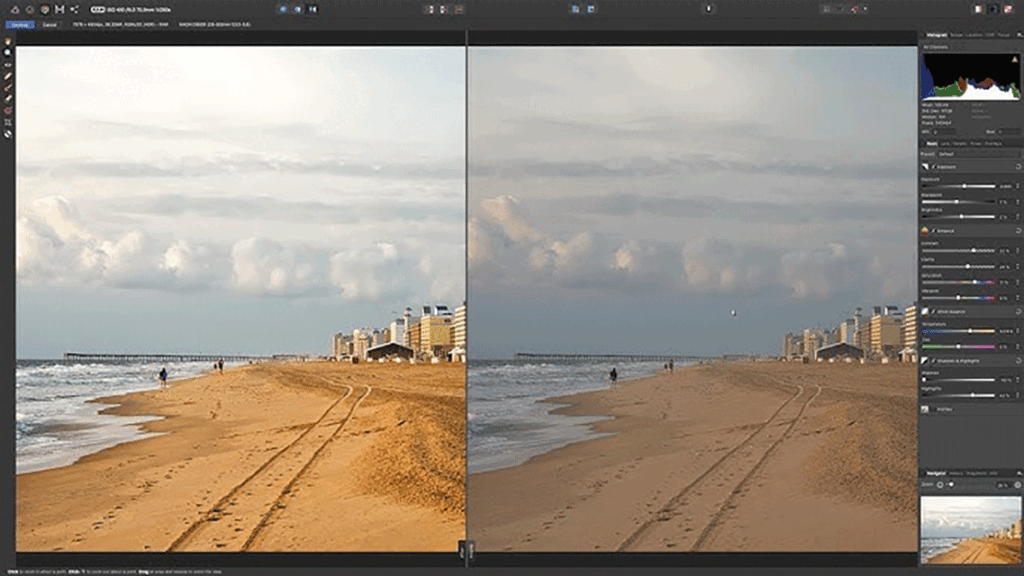
Unlocking the Full Potential of Affinity Photo for Pro-Level Editing
| Step | Tool/Technique | Description |
|---|---|---|
| RAW Image Editing | Develop Persona | Import RAW files and edit in the Develop Persona, using tools like Exposure, White Balance, and Clarity for fine-tuning. |
| High Pass Filter for Sharpening | High Pass Filter | Enhance detail by duplicating the layer, applying the filter, and setting the blending mode to Overlay or Soft Light. |
| Dodge and Burn for Portraits | Dodge & Burn Tools | Use a soft Brush Tool with Dodge for highlights and Burn for shadows to add depth. |
| Batch Processing | Macros and Batch Job | Record a macro and apply it to multiple images using Batch Job to automate processing. |
| Color Grading | HSL Panel, Color Balance, Curves | Adjust tone and color with HSL, Color Balance, and Curves for a cinematic effect. |
| Creative Filters | Filters | Apply filters (e.g., Oil Paint, Watercolor) for a unique, polished look. |
| Saving for Print | File > Export (TIFF format) | For printing, save at 300 DPI in TIFF format for high-quality output with no compression. |
| Exporting for Web/Social Media | File > Export (JPEG or PNG format) | Save for web in JPEG (70-80% quality) or PNG (transparent backgrounds). |
In this part of the Affinity Photo guide, we will dive deeper into optimizing your workflow with advanced tips and techniques. These tools will enable you to work more efficiently, improve your productivity, and achieve even higher-quality results. Whether you are retouching portraits, working with RAW images, or processing a large batch of photos, these features will take your editing skills to the next level.
Mastering RAW Image Editing in Affinity Photo
One of the most powerful features of Affinity Photo is its capability to edit RAW images directly within the software. Working with RAW files gives you greater flexibility in post-processing because they contain more image data than JPEGs or PNGs, allowing you to adjust exposure, contrast, and color without losing image quality.
Opening and Editing RAW Files
To get started, you simply need to import your RAW files into Affinity Photo, which will automatically open the Develop Persona (a specialized editing workspace for RAW processing). Here, you have a wide range of tools to fine-tune the raw image:
- Exposure: Adjust the exposure settings to fix underexposed or overexposed photos.
- White Balance: Fine-tune the color temperature to match the lighting conditions of your scene.
- Clarity: Increase or decrease the clarity to bring out more detail in your photo or create a more subtle, soft effect.
Once you’re happy with the adjustments, you can click “Develop” to bring the image into the Photo Persona, where you can continue working with the standard editing tools, such as filters, layers, and retouching brushes.
Enhancing Detail and Texture in Your Images
In advanced photo editing, sometimes it’s the finer details that make the difference. Whether you’re working with landscapes, portraits, or product photography, adding extra detail and texture can make your images pop.
High Pass Filter for Sharpening
The High Pass Filter is a great tool for enhancing detail without adding noise or artifacts to your image. By using this filter, you can sharpen specific areas while preserving the overall smoothness of the image. Here’s how to use it:
- Duplicate the layer you want to sharpen.
- Apply the High Pass Filter (found under Filter > Other > High Pass).
- Set the radius to a low value to preserve subtle details.
- Change the layer blending mode of the sharpened layer to Overlay or Soft Light.
This technique works wonders on landscapes and architectural shots, where enhancing fine details adds depth and realism.
Dodge and Burn for Portraits
In portrait retouching, Dodge and Burn is one of the most popular techniques for enhancing light and shadow. This technique helps shape the facial features and adds more dimension to your subject’s face.
- Use a soft Brush Tool on a new layer.
- Set the layer mode to Soft Light or Overlay.
- Use the Dodge Tool to lighten areas where light hits, and the Burn Tool to darken areas of shadow.
This method adds depth to the face, making the subject look more sculpted and lifelike. It’s especially effective for editorial portraits or fashion photography.
Batch Processing with Affinity Photo for Maximum Efficiency
When working with large numbers of photos, especially in professional environments, efficiency is key. Batch Processing allows you to apply the same edits to multiple images at once, saving you hours of work.
Using Batch Processing for Quick Edits
In Affinity Photo, you can use macros to automate a series of edits and then apply them to multiple images. Here’s how to do it:
- First, create a macro by recording the steps you want to apply (such as adjusting exposure, adding filters, or resizing images).
- Once the macro is recorded, go to File > New Batch Job to set up the batch processing.
- Select the folder containing the images you want to edit, and choose the macro you just created.
Affinity Photo will apply the macro to all selected images, making your workflow significantly faster. This method is perfect for photographers who need to edit large volumes of images, such as event photographers or product photographers who shoot in bulk.
Finishing Touches: Color Grading, Filters, and Special Effects
Now that you’ve learned the fundamentals and advanced techniques, it’s time to apply the finishing touches that will make your images stand out. Color grading, applying filters, and adding special effects can bring your photos to life and give them a professional polish.
Color Grading for Cinematic Looks
Color grading is an essential step for photographers and designers who want to give their work a specific look or feel. Affinity Photo offers various ways to adjust your image’s color balance and tone.
- Use the HSL (Hue, Saturation, Lightness) panel to adjust the overall tone of your image.
- Experiment with the Color Balance and Curves tools to create more dynamic color contrasts or give your photo a vintage or cinematic look.
With just a few adjustments, you can turn an average image into something cinematic, dramatic, or nostalgic, depending on your creative direction.
Applying Filters for a Creative Touch
Affinity Photo also offers a wide range of filters that can completely transform your image. From artistic effects like Oil Paint and Watercolor, to the more traditional Gaussian Blur or Lens Blur, there’s a filter for every creative need.
- Use the Filter Layer option to apply non-destructive filters to your image. This way, you can always go back and adjust or remove the filter if you change your mind later.
- Combine multiple filters for even more unique looks—whether you want to add a motion blur for a sense of speed, or a grain effect for a vintage vibe.
Applying creative filters is a fantastic way to add personality and style to your work, whether you’re working on an advertising campaign, social media post, or personal art project.
Saving and Exporting Your Work for Different Platforms
Once you’ve finished editing your photos, the final step is to save and export your files for various platforms. Whether you’re printing your work, sharing it on social media, or saving it for web use, it’s essential to choose the correct export settings.
Saving for Print
For print, always ensure your image is at 300 DPI and saved in a high-quality format, such as TIFF or PNG. TIFF is ideal for professional printing because it retains all the image data without any compression.
- Go to File > Export and choose TIFF as the format.
- Set the resolution to 300 DPI and adjust the size to fit your print dimensions.
Exporting for Web and Social Media
For web use or social media, you need to save your images at a smaller file size without compromising too much on quality. JPEG is the best format for web images, but you can also use PNG for images with transparent backgrounds.
- Choose JPEG with a quality setting of around 70-80% for a good balance of quality and file size.
- For social media, be mindful of each platform’s image size guidelines to ensure your images look great when shared.
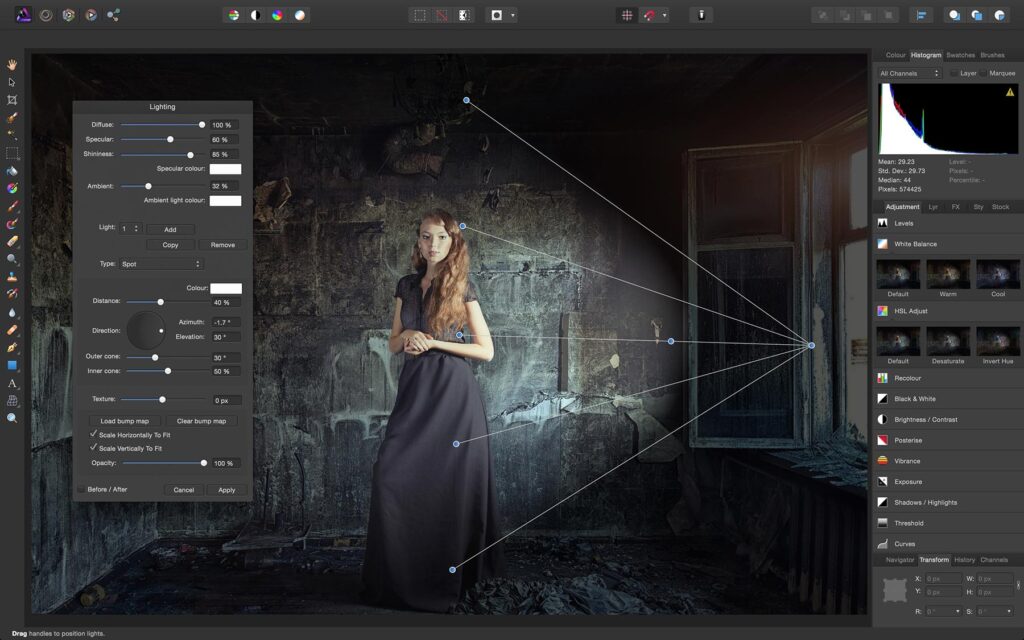
Advanced Affinity Photo Techniques for Exceptional Visuals
In this part of the Affinity Photo guide, we will explore some of the most advanced features and techniques that can elevate your editing skills to an expert level. These tips will help you bring out the best in your photos, enhance creativity, and make the most out of Affinity Photo‘s unique capabilities.
Working with Layer Styles and Effects
One of the standout features of Affinity Photo is its ability to apply various layer styles and effects non-destructively. These effects give you the freedom to experiment with your design and photo edits without committing to permanent changes until you’re fully satisfied.
Adding Layer Effects
Layer effects can help you add depth and dimension to your designs. Common effects include:
- Drop Shadow: Adds depth by creating a shadow that appears behind an object.
- Inner Glow: Creates a soft glowing effect inside the object.
- Outer Glow: Adds a glowing edge around the object.
To add a layer effect, simply select the layer, then go to Layer > Layer Effects. You can apply one or more effects and adjust their intensity, spread, and position.
By combining multiple effects, you can create complex, stylized images and designs, such as glowing text, 3D-like objects, and more.
Using Blending Modes for Creative Effects
Blending modes are powerful tools that determine how one layer interacts with the layers beneath it. They can help you create stunning effects and alter the overall mood of an image. Some of the most commonly used blending modes in Affinity Photo include:
- Multiply: Darkens the image by multiplying the pixel values of the layers.
- Screen: Lightens the image by inverting the pixels and blending them together.
- Overlay: Enhances both light and dark areas, giving an image more contrast.
Experimenting with blending modes can help you create unique photo effects, such as making an image look like a painting, blending textures with photos, or enhancing your artwork.
Working with Vectors for More Flexibility
Another powerful feature of Affinity Photo is its ability to work with vector elements alongside raster images. This gives you greater flexibility in creating scalable designs, graphics, and illustrations directly within the photo editing workspace.
Using Vector Shapes and Text
Affinity Photo allows you to draw vector shapes like rectangles, circles, and custom polygons, which can be resized without losing quality. These vector shapes can be layered and combined with photos for more complex compositions. You can also add vector text that will remain crisp and sharp, no matter how much you scale it.
- Use the Pen Tool to create custom shapes.
- Adjust the stroke and fill properties to add color, gradient, or pattern fills to your vector elements.
Incorporating vector elements into your photo edits or graphic designs makes them more versatile and adaptable for various uses, from print to digital platforms.
Precision Editing with the Pen Tool
For more detailed and precise edits, Affinity Photo offers the Pen Tool, which is ideal for creating custom paths, selections, and masks. Whether you’re extracting objects from a background or creating intricate illustrations, the Pen Tool gives you complete control.
Creating Accurate Selections
When working with complex objects or fine details, the Pen Tool allows you to draw smooth, bezier curves and anchor points, which can be adjusted at any time. This is especially useful for creating:
- Precise Cutouts: When you need to cut out an object from a busy background.
- Custom Paths: For applying effects or creating unique designs around specific objects.
- Vector Masks: For non-destructive masking, which allows you to hide or reveal parts of your layers while keeping the image intact.
The Pen Tool is one of the best ways to achieve professional-level precision in your edits, whether you’re working on intricate photo compositions or designing custom elements.
Advanced Retouching Techniques
For professional-level portrait retouching or product photography, Affinity Photo offers several advanced retouching tools that allow you to make seamless corrections without leaving any visible artifacts.
Frequency Separation for Skin Retouching
Frequency separation is an advanced technique used to separate the high-frequency details (such as textures) from the low-frequency information (such as color and lighting). This method allows you to retouch the skin in portraits without affecting the overall texture of the skin.
Here’s a simple breakdown:
- Duplicate the image into two layers.
- Apply Gaussian Blur to the low-frequency layer to smooth out skin tones.
- Use the Clone Tool or Healing Brush on the high-frequency layer to remove blemishes or imperfections.
This technique allows you to smooth the skin while retaining the natural texture, making your retouching work look flawless and natural.
The Inpainting Brush for Quick Fixes
The Inpainting Brush tool is a quick and effective way to remove unwanted elements from your image, such as blemishes, dust spots, or even objects. Simply paint over the area you want to remove, and Affinity Photo will intelligently fill in the space based on the surrounding pixels.
This tool works especially well for small, quick fixes, and it can save you time compared to manual cloning or healing methods.
Non-Destructive Editing with Adjustment Layers
Non-destructive editing is a key principle for preserving the original quality of your images. Affinity Photo excels in this area by offering various Adjustment Layers that allow you to make changes without permanently altering the original image data.
Popular Adjustment Layers
- Curves: Adjust the tonal range and contrast of your image.
- Levels: Adjust the brightness and contrast by manipulating the shadow, midtone, and highlight levels.
- Hue/Saturation: Adjust the overall color balance and saturation.
By using these layers, you can fine-tune your image at any stage of your workflow, and you can always go back and make adjustments without affecting the underlying photo.
Final Exporting Tips for Web and Print
At this point, your image should be well on its way to perfection. Before you finish, let’s review a few more export tips to ensure your image looks great wherever it’s displayed.
Optimizing for Web Use
When exporting for the web, it’s crucial to balance quality and file size. Affinity Photo lets you optimize your images for the best web performance by choosing the right export settings:
- Use JPEG for photographs and images that don’t require transparency.
- Adjust the quality setting to keep the file size manageable.
- For images with transparency, such as logos or icons, use PNG.
Exporting for Print
If you’re working with prints, ensure the image is in the correct color profile (like CMYK) for professional printing. Affinity Photo supports various color profiles, so make sure to choose the one that’s appropriate for your printer and the materials you’re printing on.
Conclusion: Becoming a Master of Affinity Photo
This concludes our ultimate guide to mastering Affinity Photo. By now, you’ve learned how to utilize its powerful tools, advanced techniques, and creative effects to create stunning visuals. From raw image editing and retouching to working with vectors and applying layer styles, Affinity Photo has everything you need to elevate your photo editing workflow.
Remember, practice is key when it comes to mastering any tool. Keep experimenting with new techniques and refining your skills, and soon you’ll be able to produce professional-grade images with ease.
Whether you’re a photographer, graphic designer, or digital artist, Affinity Photo is the perfect tool to bring your creative visions to life.
Download Links and Legal Resources for Affinity Photo
To make the most of Affinity Photo and access official guides and resources, here are the legal download links and related documentation:
Download Affinity Photo
To download the official and legal version of Affinity Photo, use the link below:
This link will direct you to the official Affinity website, where you can get the latest version of the software for various operating systems.
Official Documentation and Full Guide
For a deeper understanding of the tools and advanced techniques available in Affinity Photo, refer to the official documentation provided by the Serif team. This resource includes user guides, advanced tips, and techniques for professional image editing.
Online Tutorials and Learning Resources
If you’re looking for comprehensive and professional tutorials to get the most out of Affinity Photo, you can access the following links:
Support and Community Forums
For support from the development team or third-party companies, you can visit the official forums or support section of the Affinity website:
Discover the power of Final Cut Pro, a comprehensive and advanced video editing software that offers everything you need to create professional-quality videos. From importing media files to advanced color grading and audio editing, Final Cut Pro provides a wide range of tools and features to elevate your video projects. Whether you’re a beginner or a professional, Final Cut Pro will take your video editing skills to the next level. Learn more about this powerful software in our detailed guide: Final Cut Pro: Advanced Video Editing Software.







Post Comment